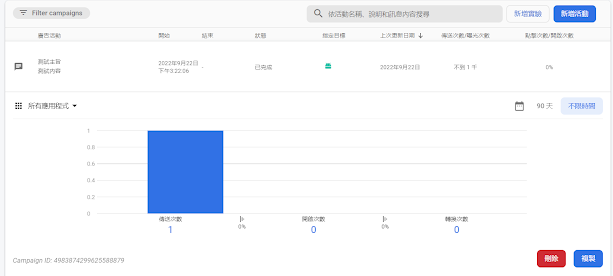
待補
2022年9月22日 星期四
【Xamarin】Firebase Cloud Messaging 推播API說明
此篇是講解如何使用API主動推播給APP的用戶
API總共有兩種呼叫方式
先進入FCM的專案設定 =>雲端設定
選擇一個Admin的帳戶點入後,在點選密鑰頁籤內的[添加密鑰]=>[創建新密鑰]。

選擇JSON格式後,網頁會自動下載。
成功後就可以看到有一個密鑰產生。(下載檔案後面會用到)
程式部分用Winform當作範例,並安裝相關的Nuget套件。
Winform建立一個按鈕和三個文字框,並定義成下圖所示。
在按鈕的Click事件上寫下方程式(要注意定義的名稱)
private void btnSend_Click(object sender, EventArgs e)
{
string token = txtToken.Text;
string notificationTitle = txtTitle.Text;
string notificationBody = txtContent.Text;
// See documentation on defining a message payload.
var message = new FirebaseAdmin.Messaging.Message()
{
Data = new Dictionary<string, string>()
{
{ "myData", "1337" },
},
//Token = registrationToken,
//Topic = "all",
Notification = new Notification()
{
Title = notificationTitle,
Body = notificationBody
},
//IOS 專用屬性
Apns=new ApnsConfig(){
Aps= new Aps
{
//紅點數字通知,傳1代表固定顯示1。
Badge=1
}
}
};
if (string.IsNullOrEmpty(token))
{
message.Topic = "all";
}
else
{
message.Token = token;
}
// Send a message to the device corresponding to the provided
// registration token.
string response = FirebaseMessaging.DefaultInstance.SendAsync(message).Result;
// Response is a message ID string.
Console.WriteLine("Successfully sent message: " + response);
}
開始偵錯專案,填入Token、主旨和內容,點選發送。
手機就可以看到推播訊息。
【Xamarin】Firebase Cloud Messaging 安卓-推播功能實作
Xamarin 開發推播功能時可以用Google的FCM(Firebase Cloud Messaging)來實現,下列列出安卓的實作流程。
輸入專案名稱
選擇是否加入Google Analytics(推薦選繼續,後續在說明Google分析的使用方式)
選擇Google Analytics帳戶(選擇預設即可)

新增專案後新增安卓應用程式
填入應用程式的套件名稱(自行定義,會設定至程式的套件名稱)
下載Google-service.json檔(須放置在安卓程式的專案根目錄)
後續一直按繼續就成功了,再來就要設定程式的部分。
安卓要先設定其套件名稱,點選安卓專案->屬性->安卓資訊清單,填入剛剛新增FCM應用程式時的套件名稱
安卓專案安裝需要的Nuget套件
有幾個套件需要下載:1.Xamarin.GooglePlaySercices.Base2.Xamarin.Firebase.Messaging3.Xamarin.Google.Dapper4.Prisim (可以不安裝,只是一種設計模式來優化程式)
安裝時需要注意編譯的安卓版本,可以看MonoAndroid的版本去做下載,以下為範例程式的載Nuget截圖。
將剛剛下載的google-services.json加入專案的根目錄
在AndroidManifest.xml新增<reciver>
<receiver android:name="com.google.firebase.iid.FirebaseInstanceIdInternalReceiver" android:exported="false" />
<receiver android:name="com.google.firebase.iid.FirebaseInstanceIdReceiver" android:exported="true" android:permission="com.google.android.c2dm.permission.SEND">
<intent-filter>
<action android:name="com.google.android.c2dm.intent.RECEIVE" />
<action android:name="com.google.android.c2dm.intent.REGISTRATION" />
<category android:name="${applicationId}" />
</intent-filter>
</receiver>
建立CustomFirebaseMessagingService服務
CustomFirebaseMessagingService範例
[Service]
[IntentFilter(new[] { "com.google.firebase.MESSAGING_EVENT" })]
public class CustomFirebaseMessagingService : FirebaseMessagingService
{
public readonly ILocalNotificationsService localNotificationsService;
public CustomFirebaseMessagingService()
{
localNotificationsService = new LocalNotificationsService();
}
public override void OnNewToken(string token)
{
base.OnNewToken(token);
Log.Debug("FMC_SERVICE", token);
}
public override void OnMessageReceived(RemoteMessage message)
{
var notification = message.GetNotification();
localNotificationsService.ShowNotification(notification.Title, notification.Body, message.Data);
}
}
如果知道Token可用上圖右側[傳送測試訊息]
如果不知道Token可直接依照Topic或是指定條件做群發。
[ASP.Net]GridView自訂分頁處理
ASP.Net的GirdView在每次分頁處理時都會在重新抓取所有資料在進行分頁,遇到大量資料或是設計不良的情況下,在切換時頁面會卡住,造成使用者體驗不佳。 可以透過GirdView內建的參數以及SQL OFFSET語法來替代原先的分頁處理,以下為步驟說明 1.asp...

-
ASP.Net的GirdView在每次分頁處理時都會在重新抓取所有資料在進行分頁,遇到大量資料或是設計不良的情況下,在切換時頁面會卡住,造成使用者體驗不佳。 可以透過GirdView內建的參數以及SQL OFFSET語法來替代原先的分頁處理,以下為步驟說明 1.asp...
-
實作說明:目前參考公司專案{TOGO}的混合式APP當成實作練習,原先架構為MVC+JQuery Mobile。 程式架構: MVC+Webix 程式說明: Header和Footer實作於_Layout.cshtml,中間頁面採取Razor寫法,用@Ren...
-
Webix列表是一個與UI相關的組件,它從視圖繼承並顯示列出的數據項。 Webix庫提供除標準列表以外的三種列表變體-GroupList,X-List和UnitList。 畫面呈現: 程式碼: webix.ui({ view:"list...


